
Need to know how to install door hinges and replace them? Here is how to do it.
What you’ll need:
- A hammer
- A nail
- A flat-bladed screwdriver
- A pry bar
- A large piece of cardboard
Door hinges play a crucial part in our daily lives; they support all your doors.
External door hinges provide families within the first level of security and defend against the elements.
They allow family members privacy inside the house.
Door hinges, either new or replacement hinges, are an easy to master skill and can be of invaluable value to many homeowners, particularly those who like D.I.Y. projects.
1. If you install a new door, you will have to identify the exact placement of your hinges on the frame of the door.
Most doors require at least two hinges: one hinge is situated 7" above the door frame; the other hinges are situated 11" below the door frame.
Measure this distance and indicate the place on the frame, then do the same thing on the door.
2. Put your hook on the door and the jamb, use a pencil to carefully draw the hook.
The depth of the hinge should always be as large as the hinge.
Take double check before you move to the next step to ensure that your outlines matches the same place on the door.
Use a knife to mark the outline, which makes it simpler to cut the frame.
3. Cut the mortise. Cut the mortise.
The word 'cut off the mortise' is the professional name for the jamb in bodies, so that the hinge is inserted in the jamb and provides a greater appeal for strength and esthetics.
A extremely sharp chisel and hammer are needed to carve the mortise.
Tap into the jamb from the side to remove tiny slices of wood while carefully fishing the chisel.
Don't cut the mortise too deeply, because over time this will make the hinge become loose.
Cut off the given depth and the region
4. Mark where the screws are located.
Replace the hinge in the jamb you are cutting the mortise.
To indicate the placement of the jamb, use your pencil.
Do the same for the placement of the door hinge.
Take off the hinges when the marking is finished.
5. Drill the pilot holes.
To drill extremely small pilot holes in the positioning of the screws outlined on the jamb, use a driller or a screwdriver.
To ensure the screws are not unintentionally moved out of the spot, tap them softly first.
Use a screw guide to keep the twists as they enter the wood straight.
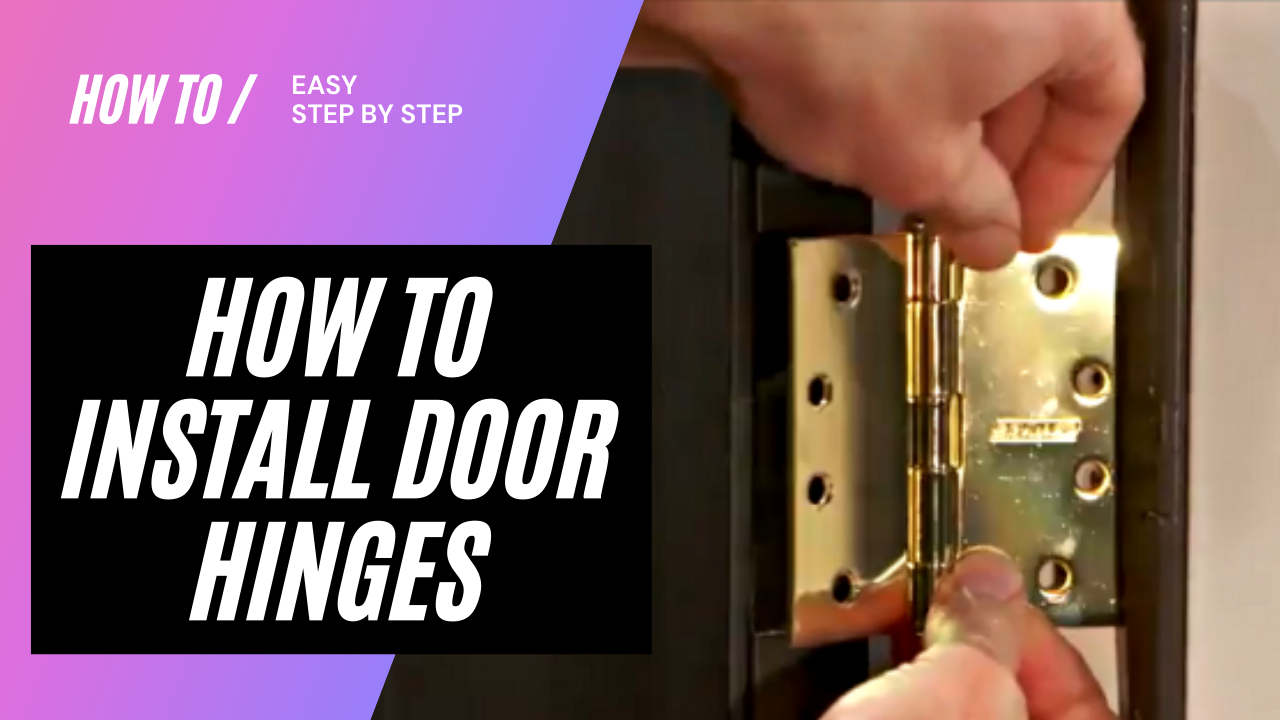
6. Install each of the hinges.
Put your hinges back into the door or jamb and fasten them individually with a drill or screw-driver.
7. Make a connection between the door and the jamb.
Hold the door in place, if required putting blocks beneath the bottom to support it. Arrange the two hinge plates so that the ones on the door and the ones in the jamb are in the same place.
Remove the blocks from the door and slide the hinge pins into position. After that, test the door to see whether it works, and you're done!
install door hinges and replace is easy as one, two and three.
0 comments